Displayables
A displayable is an object that can be shown to the user. Ren'Py displayables can be used in many ways.
Assignment to an image name using the
imagestatement.Added to a screen using the screen language
addstatement.Assignment to certain config variables.
Assignment to certain style properties.
When a Ren'Py function or variable expects a displayable, there are several things that can be provided:
An object of type Displayable, created by calling one of the functions given below.
A string with a colon
:in it. These are rare, but see the section on displayable prefixes below.A string with a dot
.in it. Such a string is interpreted as a filename byImage().A color. A color may either be given as a hexadecimal color string in "#rgb", "#rgba", "#rrggbb", or "#rrggbbaa" form, a
Color, or an (r, g, b, a) tuple, where each component is an integer between 0 and 255. Colors are passed toSolid().An image name. Any other string is interpreted as a reference to an image, either defined with the image statement or auto-defined from the images directory.
A list. If a list is provided, each item is expanded as described below, and checked to see if it matches a filename or image name. If so, expansion stops and the matched thing is then processed as described above.
Strings may have one or more square-bracket substitutions in them, such as "eileen [mood]" or "eileen_[outfit]_[mood].png". When such a string is given, a dynamic image is created. A dynamic image has text interpolation performed at the start of each interaction (such as say statements and menus). The resulting string is processed according to the rules above.
When a string has "[prefix_]" in it, that substitution is replaced with each of the style prefixes associated with the current displayable.
Images
The most commonly used displayable is Image, which loads a file from disk and displays it. Since Image is so commonly used, when a string giving a filename is used in a context that expects a displayable, an Image is automatically created. The only time it's necessary to use Image directly is when you want to create an image with style properties.
- Image(filename, *, optimize_bounds=True, oversample=1, dpi=96, mipmap=None, **properties)
Loads an image from a file. filename is a string giving the name of the file.
- filename
This should be an image filename, including the extension.
- optimize_bounds
If true, only the portion of the image that inside the bounding box of non-transparent pixels is loaded into GPU memory. (The only reason to set this to False is when using an image as input to a shader.)
- oversample
If this is greater than 1, the image is considered to be oversampled, with more pixels than its logical size would imply. For example, if an image file is 2048x2048 and oversample is 2, then the image will be treated as a 1024x1024 image for the purpose of layout.
- dpi
The DPI of an SVG image. This defaults to 96, but that can be increased to render the SVG larger, and decreased to render it smaller.
- mipmap
If this is "auto", then mipmaps are generated for the image only if the game is scaled down to less than 75% of its default size. If this is True, mipmaps are always generated. If this is False, mipmaps are never generated. If this is None, then the default is taken from config.mipmap.
# These two lines are equivalent.
image logo = "logo.png"
image logo = Image("logo.png")

# Using Image allows us to specify a default position as part of
# an image.
image logo right = Image("logo.png", xalign=1.0)
There are four image file formats we recommend you use:
AVIF
WEBP
PNG
JPG
And one vector image file format we recommend:
SVG
Non-animated GIF and BMP files are also supported, but should not be used in modern games.
Loading an Image from a file on disk and decoding it so it can be drawn to the screen takes a long amount of time. While measured in the tenths or hundreds of seconds, the duration of the loading process is long enough that it can prevent an acceptable framerate, and become annoying to the user.
Since an Image is of a fixed size, and doesn't change in response to input, game state, or the size of the area available to it, an Image can be loaded before it is needed and placed into an area of memory known as the image cache. Once an Image is decoded and in the cache, it can be quickly drawn to the screen.
Ren'Py attempts to predict the images that will be used in the future, and loads them into the image cache before they are used. When space in the cache is needed for other images, Ren'Py will remove images that are no longer being used.
By default, Ren'Py will predictively cache up to 8 screens worth of
image data. (If your screen is 800x600, then a screen's worth of data
is one 800x600 image, two 400x600 images, and so on.) This can be
changed with the config.image_cache_size configuration
variable.
Although the precise amount is dependent on implementation details and there is significant overhead, as a rule of thumb, each pixel in the image cache consumes 4 bytes of main memory and 4 bytes of video memory.
SVG Images
Ren'Py supports many SVG 1.0 images, using the NanoSVG library. Some unsupported features include:
Text elements are ignored. If the text is converted into a path, it will be rendered.
Embedded bitmaps are ignored.
Scripts are ignored.
Animations are ignored.
A list of features NanoSVG supports may be found here.
It's recommended to convert everything in an SVG image that will not render properly into paths.
Ren'Py will render SVG images as if the virtual screen was 96dpi. If the window is enlarged or shrunk, the SVG image will be scaled up or down, respectively, and oversampling will be used to ensure the image is rendered at the correct virtual size.
This ensures the SVG will be rendered sharp if it is not scaled.
Image-Like Displayables
We call these displayables image-like because they take up a rectangular area of the screen, and do not react to input. These differ from normal images by varying their size to fill an area (Frame, Tile, and Solid), or by allowing the user to specify their size (Composite, Crop, Null). They are not image manipulators.
Image-like displayables take Position Style Properties.
- class AlphaMask(child, mask, invert=False, **properties)
This displayable takes its colors from child, and its alpha channel from the multiplication of the alpha channels of child and mask. The result is a displayable that has the same colors as child, is transparent where either child or mask is transparent, and is opaque where child and mask are both opaque.
The child and mask parameters may be arbitrary displayables. The size of the AlphaMask is the size of child. The invert parameter can be used to invert the mask's alpha channel.
Note that this takes different arguments from
im.AlphaMask(), which uses the mask's red channel.
- class Borders(left, top, right, bottom, pad_left=0, pad_top=0, pad_right=0, pad_bottom=0)
This object provides border size and tiling information to a
Frame(). It can also provide padding information that can be supplied to thepaddingstyle property of a window or frame.- left, top, right, bottom
These provide the size of the insets used by a frame, and are added to the padding on each side. They should be zero or a positive integer.
- pad_left, pad_top, pad_right, pad_bottom
These are added to the padding on each side, and may be positive or negative. (For example, if left is 5 and pad_left is -3, the final padding is 2.)
The padding information is supplied via a field:
- padding
This is a four-element tuple containing the padding on each of the four sides.
- Composite(size, *args, **properties)
This creates a new displayable of size, by compositing other displayables. size is a (width, height) tuple.
The remaining positional arguments are used to place images inside the Composite. The remaining positional arguments should come in groups of two, with the first member of each group an (x, y) tuple, and the second member of a group is a displayable that is composited at that position.
Displayables are composited from back to front.
image eileen composite = Composite(
    (300, 600),
    (0, 0), "body.png",
    (0, 0), "clothes.png",
    (50, 50), "expression.png")
- Crop(rect, child, **properties)
This creates a displayable by cropping child to rect, where rect is an (x, y, width, height) tuple.
image eileen cropped = Crop((0, 0, 300, 300), "eileen happy")
- class DynamicImage(name)
A DynamicImage is a displayable that has text interpolation performed on it to yield a string giving a new displayable. Such interpolation is performed at the start of each interaction.
- class Flatten(child, drawable_resolution=True, **properties)
This flattens child, which may be made up of multiple textures, into a single texture.
Certain operations, like the alpha transform property, apply to every texture making up a displayable, which can yield incorrect results when the textures overlap on screen. Flatten creates a single texture from multiple textures, which can prevent this problem.
Flatten is a relatively expensive operation, and so should only be used when absolutely required.
- drawable_resolution
Defaults to true, which is usually the right choice, but may cause the resulting texture, when scaled, to have different artifacts than the textures that make it up. Setting this to False will change the artifacts, which may be more pleasing in some cases.
- class Frame(image, left=0, top=0, right=None, bottom=None, *, tile=False, **properties)
A displayable that resizes an image to fill the available area, while preserving the width and height of its borders. It is often used as the background of a window or button.
Using a frame to resize an image to double its size.
- image
An image manipulator that will be resized by this frame.
- left
The size of the border on the left side. This can also be a
Borders()object, in which case that object is used in place of the other parameters.- top
The size of the border on the top.
- right
The size of the border on the right side. If None, defaults to left.
- bottom
The side of the border on the bottom. If None, defaults to top.
- tile
If set to True, tiling is used to resize sections of the image, rather than scaling. If set to the string "integer", the nearest integer number of tiles will be used in each direction. That set of full tiles will then be scaled up or down to fit the required area.
# Resize the background of the text window if it's too small.
init python:
    style.window.background = Frame("frame.png", 10, 10)
- class Null(width=0, height=0, **properties)
A displayable that creates an empty box on the screen. The size of the box is controlled by width and height. This can be used when a displayable requires a child, but no child is suitable, or as a spacer inside a box.
image logo spaced = HBox("logo.png", Null(width=100), "logo.png")
- class Solid(color, **properties)
A displayable that fills the area its assigned with color.
image white = Solid("#fff")
- class Tile(child, style='tile', **properties)
Tiles child until it fills the area allocated to this displayable.
image bg tile = Tile("bg.png")
Text Displayables
See Text Displayables.
Dynamic Displayables
Dynamic displayables display a child displayable based on the state of the game.
Note that these dynamic displayables always display their current state. Because of this, a dynamic displayable will not participate in a transition. (Or more precisely, it will display the same thing in both the old and new states of the transition.)
By design, dynamic displayables are intended to be used for things that change rarely and when an image defined this way is off screen (Such as a character customization system). It is not designed for things that change frequently, such as character emotions.
- ConditionSwitch(*args, predict_all=None, **properties)
This is a displayable that changes what it is showing based on Python conditions. The positional arguments should be given in groups of two, where each group consists of:
A string containing a Python condition.
A displayable to use if the condition is true.
The first true condition has its displayable shown, at least one condition should always be true.
The conditions uses here should not have externally-visible side-effects.
- predict_all
If True, all of the possible displayables will be predicted when the displayable is shown. If False, only the current condition is predicted. If None,
config.conditionswitch_predict_allis used.
image jill = ConditionSwitch(
    "jill_beers > 4", "jill_drunk.png",
    "True", "jill_sober.png")
- class DynamicDisplayable(function, *args, **kwargs)
A displayable that can change its child based on a Python function, over the course of an interaction. It does not take any properties, as its layout is controlled by the properties of the child displayable it returns.
- function
A function that is called with the arguments:
The amount of time the displayable has been shown for.
The amount of time any displayable with the same tag has been shown for.
Any positional or keyword arguments supplied to DynamicDisplayable.
and should return a (d, redraw) tuple, where:
d is a displayable to show.
redraw is the maximum amount of time to wait before calling the function again, or None to not require the function be called again before the start of the next interaction.
function is called at the start of every interaction.
As a special case, function may also be a python string that evaluates to a displayable. In that case, function is run once per interaction.
# Shows a countdown from 5 to 0, updating it every tenth of
# a second until the time expires.
init python:

    def show_countdown(st, at):
        if st > 5.0:
            return Text("0.0"), None
        else:
            d = Text("{:.1f}".format(5.0 - st))
            return d, 0.1

image countdown = DynamicDisplayable(show_countdown)
- ShowingSwitch(*args, predict_all=None, **properties)
This is a displayable that changes what it is showing based on the images are showing on the screen. The positional argument should be given in groups of two, where each group consists of:
A string giving an image name, or None to indicate the default.
A displayable to use if the condition is true.
A default image should be specified.
- predict_all
If True, all of the possible displayables will be predicted when the displayable is shown. If False, only the current condition is predicted. If None,
config.conditionswitch_predict_allis used.
One use of ShowingSwitch is to have images change depending on the current emotion of a character. For example:
image emotion_indicator = ShowingSwitch(
   "eileen concerned", "emotion_indicator concerned",
   "eileen vhappy", "emotion_indicator vhappy",
   None, "emotion_indicator happy")
Layer Displayables
Layer displayables display the contents of a layer based on the state of the
game. They are intended for use with config.detached_layers.
Note that similar to dynamic displayables, the layers shown within always display their current state. Because of this, the contents of a layer displayable will not participate in a transition, unless that transition is targeted at the layer being displayed.
- class Layer(layer, *, clipping=True, **properties)
This allows a layer to be shown as a displayable on another layer. Intended for use with detached layers.
Trying to display a layer on itself is not supported.
- layer
The layer to display.
- clipping
If False, the layer's contents may exceed its bounds, otherwise anything exceeding the bounds will be trimmed.
An entry in config.layer_clipping will cause this option to be ignored, and clipping to occur as specified by that config.
# A new detached layer to hold the contents of a broadcast.
define config.detached_layers += [ "broadcast" ]

# A layer displayable to represent a TV and watch the broadcast layer.
image tv = Window(Layer("broadcast"), background='#000', padding=(10, 10), style="default")

image living_room = Placeholder('bg', text='living_room')
image studio = Solid('7c7')
image eileen = Placeholder('girl')

label example:
    pause

    # Set up the broadcast scene.
    scene studio onlayer broadcast
    with None

    # Begin a new scene in the living room.
    scene living_room

    # Show the TV in the lower right corner of ths screen.
    show tv:
      align (.75, .75) zoom .3

    # Show Eileen in the broadcast.
    show eileen onlayer broadcast

    # Dissolve into the living room, as Eileen enters the TV from the right.
    with {'master': dissolve, 'broadcast': moveinright}
    pause
Layout Boxes and Grids
Layout boxes are displayables that lay out their children on the screen. They can lay out the children in a horizontal or vertical manner, or lay them out using the standard positioning algorithm.
The box displayables take any number of positional and keyword arguments. Positional arguments should be displayables that are added to the box as children. Keyword arguments are style properties that are applied to the box.
Boxes take Position Style Properties and Box Style Properties.
- Fixed(*args, **properties)
A box that fills the screen. Its members are laid out from back to front, with their position properties controlling their position.
- HBox(*args, **properties)
A box that lays out its members from left to right.
- VBox(*args, **properties)
A layout that lays out its members from top to bottom.
# Display two logos, to the left and right of each other.
image logo hbox = HBox("logo.png", "logo.png")

# Display two logos, one on top of the other.
image logo vbox = VBox("logo.png", "logo.png")

# Display two logos. Since both default to the upper-left
# corner of the screen, we need to use Image to place
# those logos on the screen.
image logo fixed = Fixed(
    Image("logo.png", xalign=0.0, yalign=0.0),
    Image("logo.png", xalign=1.0, yalign=1.0))
The Grid layout displays its children in a grid on the screen. It takes
Position Style Properties and the spacing style
property.
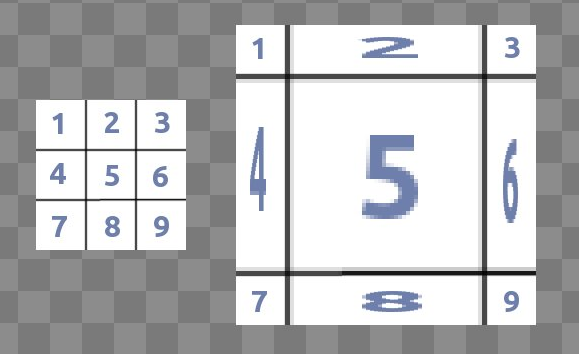
- Grid(cols, rows, *args, **properties)
Lays out displayables in a grid. The first two positional arguments are the number of columns and rows in the grid. This must be followed by columns * rows positional arguments giving the displayables that fill the grid.
Effects
These displayables are used to create certain visual effects.
- AlphaBlend(control, old, new, alpha=False)
This transition uses a control displayable (almost always some sort of animated transform) to transition from one displayable to another. The transform is evaluated. The new displayable is used where the transform is opaque, and the old displayable is used when it is transparent.
- alpha
If true, the image is composited with what's behind it. If false, the default, the image is opaque and overwrites what's behind it.
Image Manipulators
Image manipulators are an historic kind of displayables that apply transformations or operations exclusively to other images or image manipulators - to the exclusion of the other kinds of displayables.
An image manipulator can be used any place a displayable can, but not
vice-versa. An Image() is a kind of image manipulator, so an
Image can be used whenever an image manipulator is required.
Their use is historic. A number of image manipulators that had been documented
in a distant past should no longer be used, as they suffer from inherent
problems, and in general (except for im.Data()), the Transform()
displayable provides similar functionality while fixing the problems.
For the list of image manipulators, see the image manipulator documentation.
Placeholders
The Placeholder displayable is used to display background or character images as appropriate. Placeholders are used automatically when an undefined image is used in developer mode. Placeholder displayables can also be used manually when the defaults are inappropriate.
# By default, the girl placeholder will be used.
image sue = Placeholder("boy")

label start:
    show sue angry
    "Sue" "How do you do? Now you gonna die!"
- class Placeholder(base=None, full=False, flip=None, text=None, **properties)
This displayable can be used to display a placeholder character or background.
- base
The type of image to display. This should be one of:
- 'bg'
To display a background placeholder. This currently fills the screen with a light-gray, and displays the image name at the top of the screen.
- 'boy'
Displays a male-identified placeholder with the image name on his chest.
- 'girl'
Displays a female-identified placeholder with the image name on her chest.
- None
Attempts to automatically determine the type of image to use. If the image name begins with "bg", "cg", or "event", uses 'bg'.
Otherwise, the 'girl' placeholder is used.
- full
If true, a full-body sprite is used. Otherwise, a 3/4 sprite is used.
- flip
If true, the sprite is flipped horizontally.
- text
If provided, no other text than this will be displayed on the placeholder. If not, the text will reflect the show instruction that was used to display it.
Displayable Prefixes
Displayable prefixes make it possible for a creator to define their own
displayables, and refer to them anywhere a displayable can be used in
Ren'Py. A prefixed displayable is a string with a colon in it. The prefix
is to the left of the colon, and the argument is anything to the right of
it. The config.displayable_prefix variable maps a prefix to a function.
The function takes the argument, and either returns a displayable or None.
For example, this makes the big prefix return an image that is twice as big as the original.
init -10 python:
    def embiggen(s):
        return Transform(s, zoom=2)

    config.displayable_prefix["big"] = embiggen
The init -10 makes sure the prefix is defined before any images that use it.
The prefix can then be used to define images:
image eileen big = "big:eileen happy"
or in any other place where a displayable is required.
See also
Displaying Images : the basics of how to make all these displayables appear on the screen.